Tutorial 1: Creating Your First World (Procedural Caves)
This tutorial will guide you through creating a simple organic cave system using the World Generator's node-based workflow.
Prerequisites
- A Unity project with the Dynamic Dungeon tool installed.
- A 2D Scene with a Grid and Tilemap layers (e.g., "Background", "Ground", "Walls").
Step 1: Create a Biome Asset
Before we generate logic, we need to tell the tool what tiles to use.
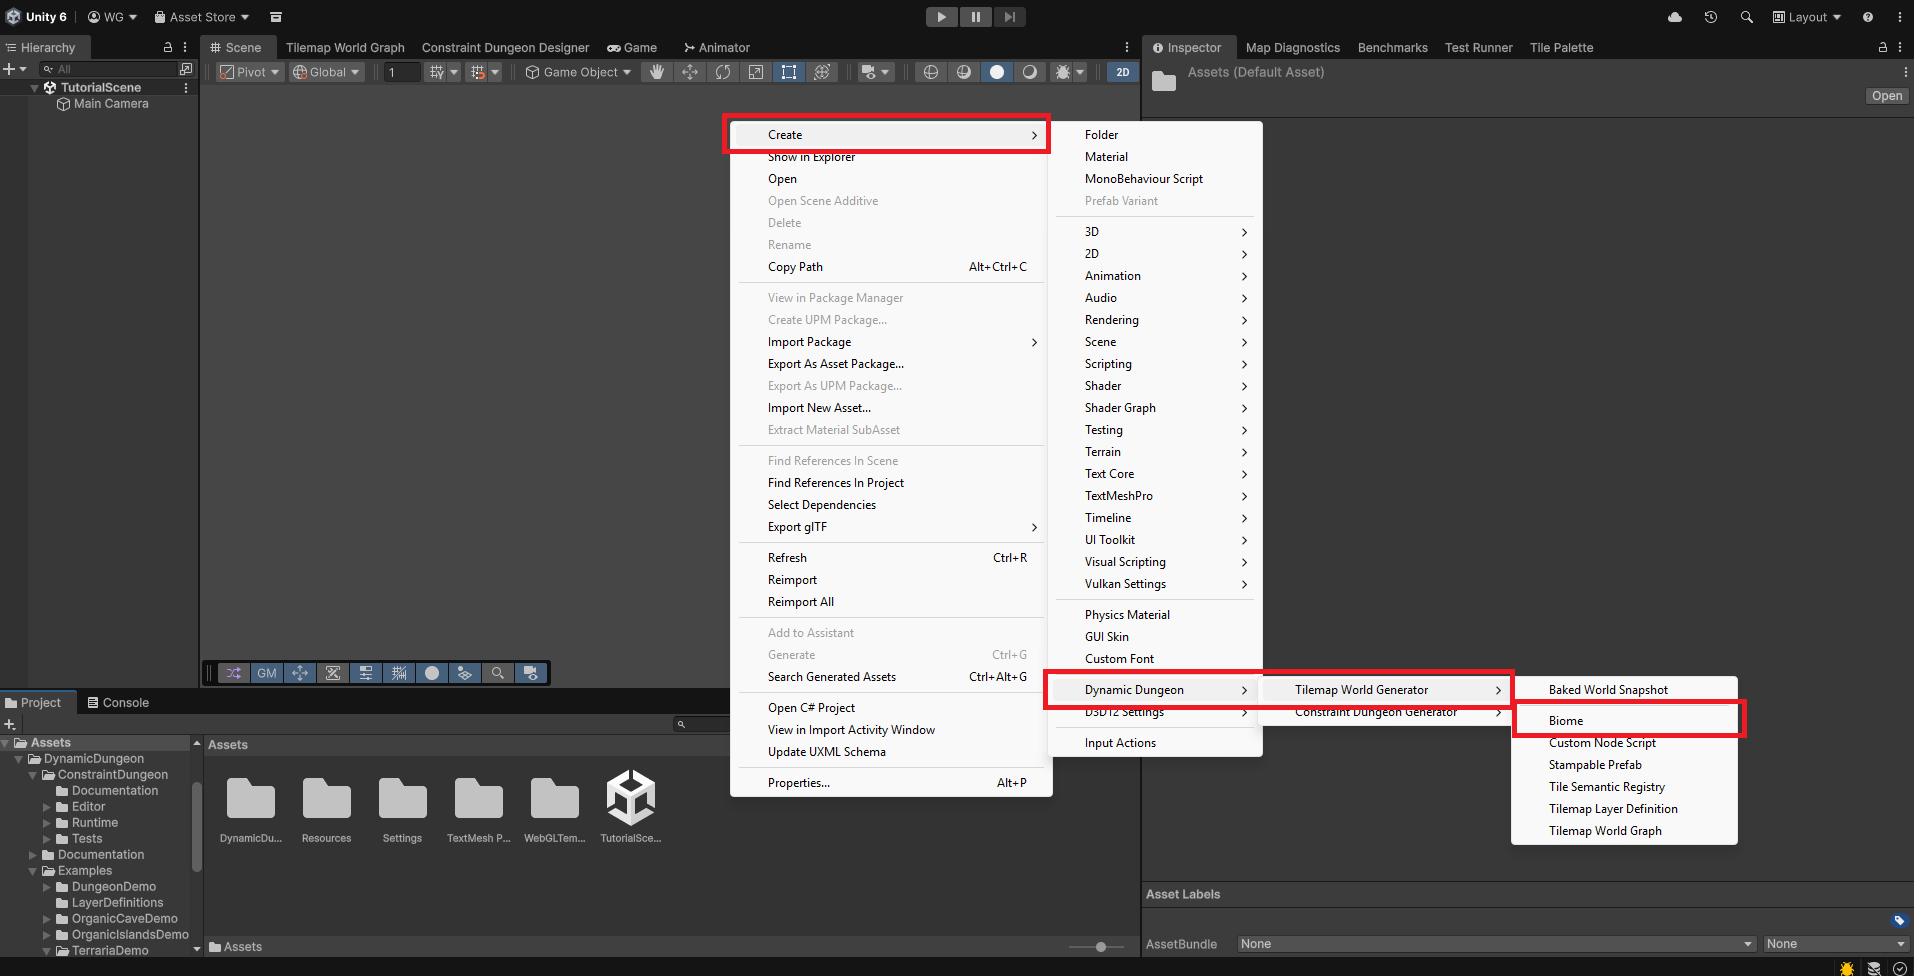
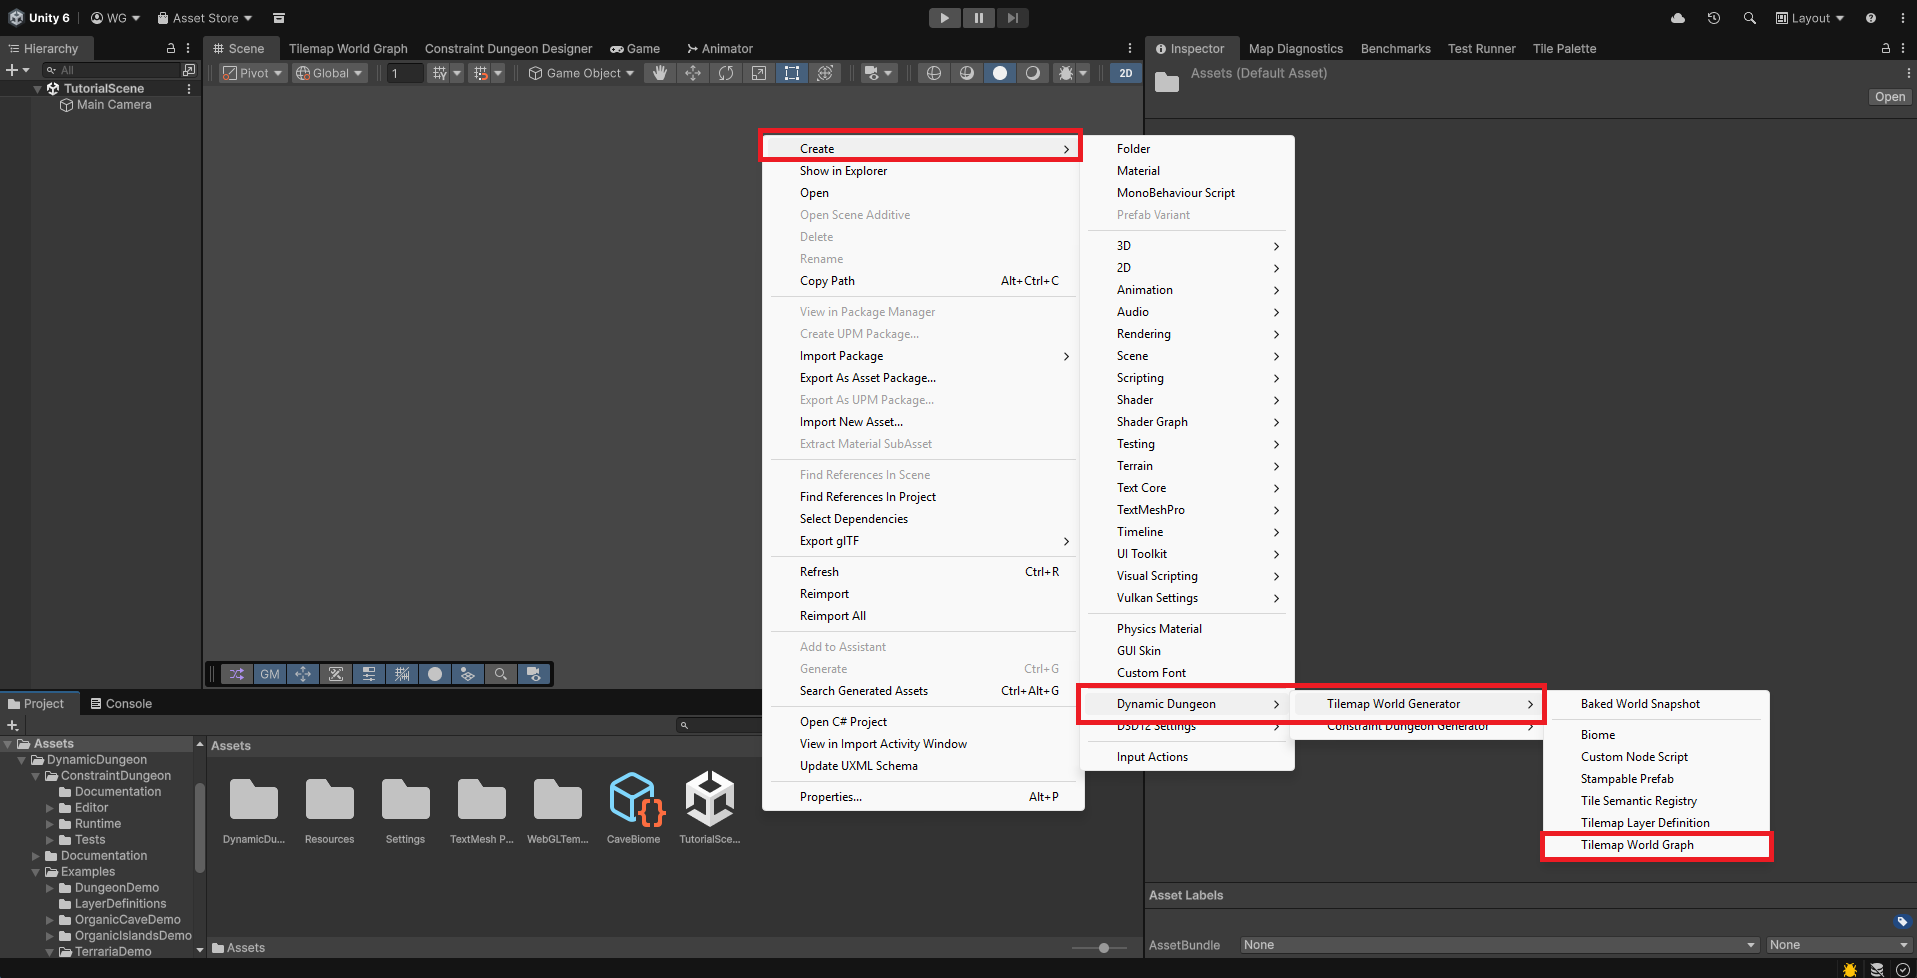
- Right-click in your Project window: Create > Dynamic Dungeon > Tilemap World Generator > Biome.
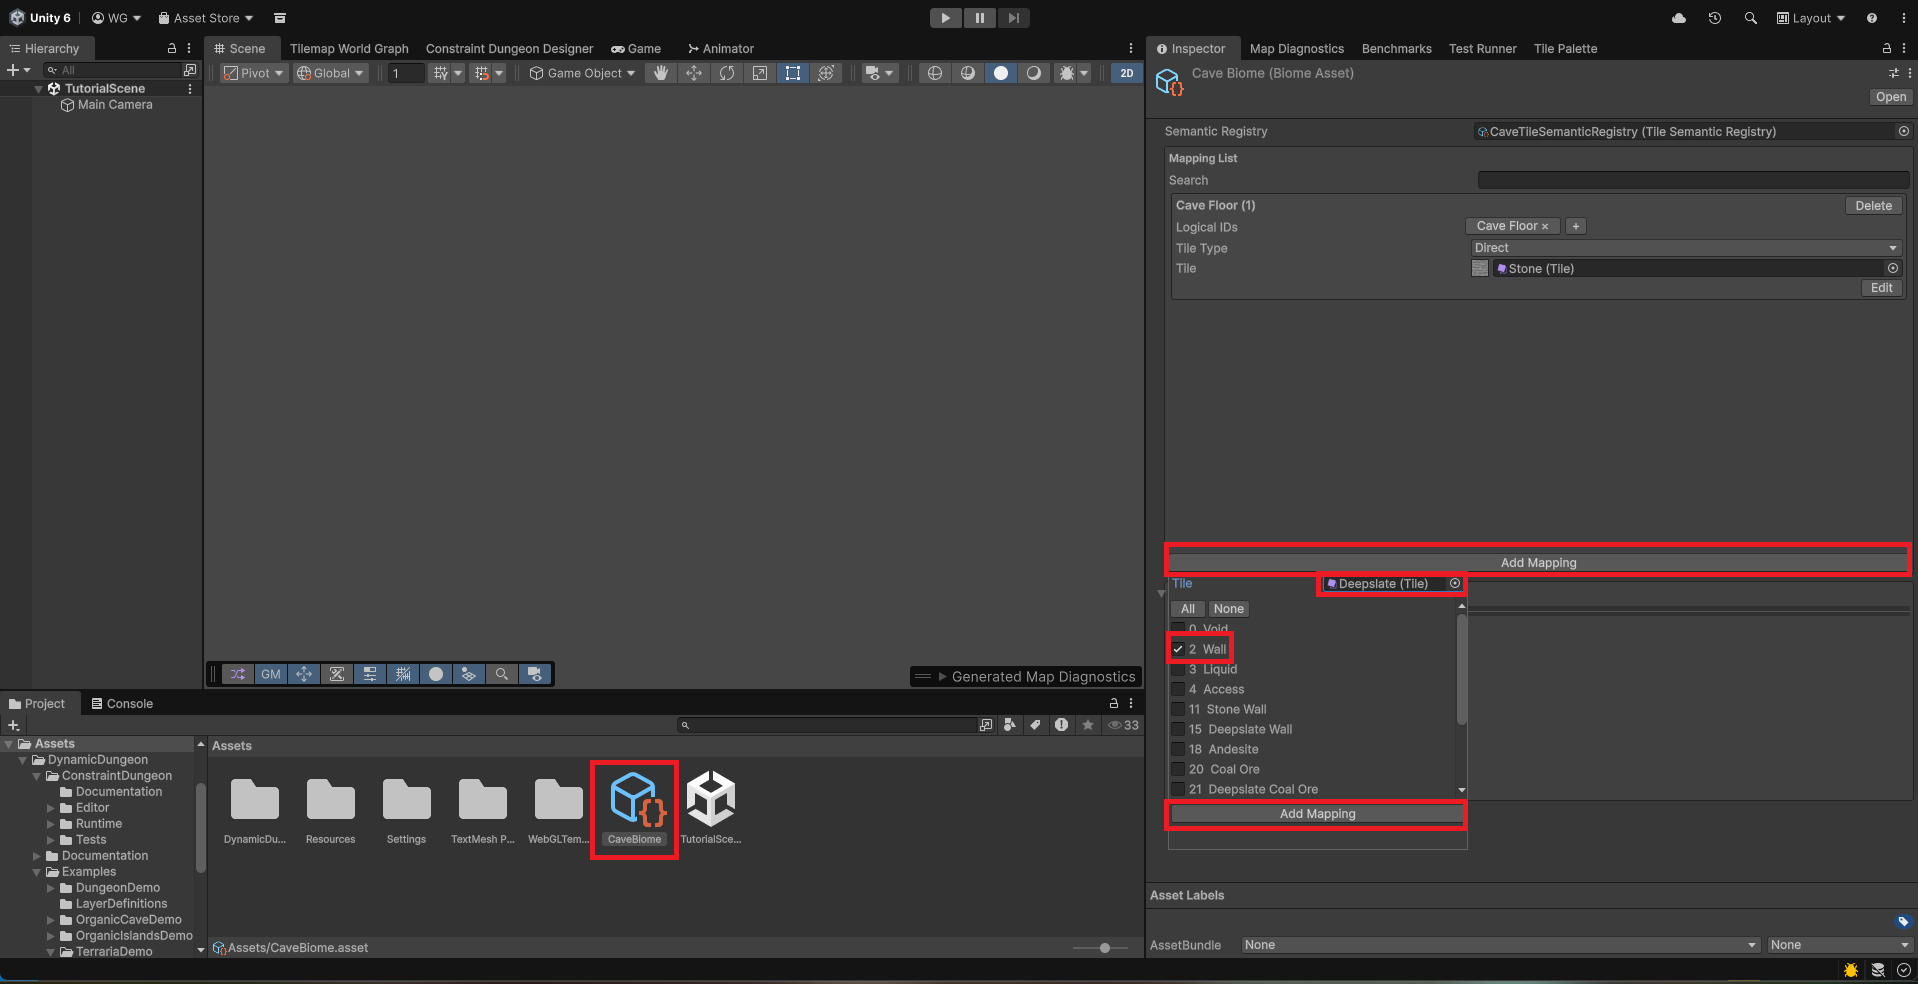
- Name it
CaveBiome. - In the inspector, add two entries:
- Logical ID 1 (Floor): Assign your cave floor tiles.
- Logical ID 2 (Wall): Assign your cave wall tiles.
Step 2: Create the Generation Graph
- Right-click in your Project window: Create > Dynamic Dungeon > Tilemap World Generator > Tilemap World Graph.
- Name it
CaveGraph. - Double-click it to open the Tilemap World Graph Editor.
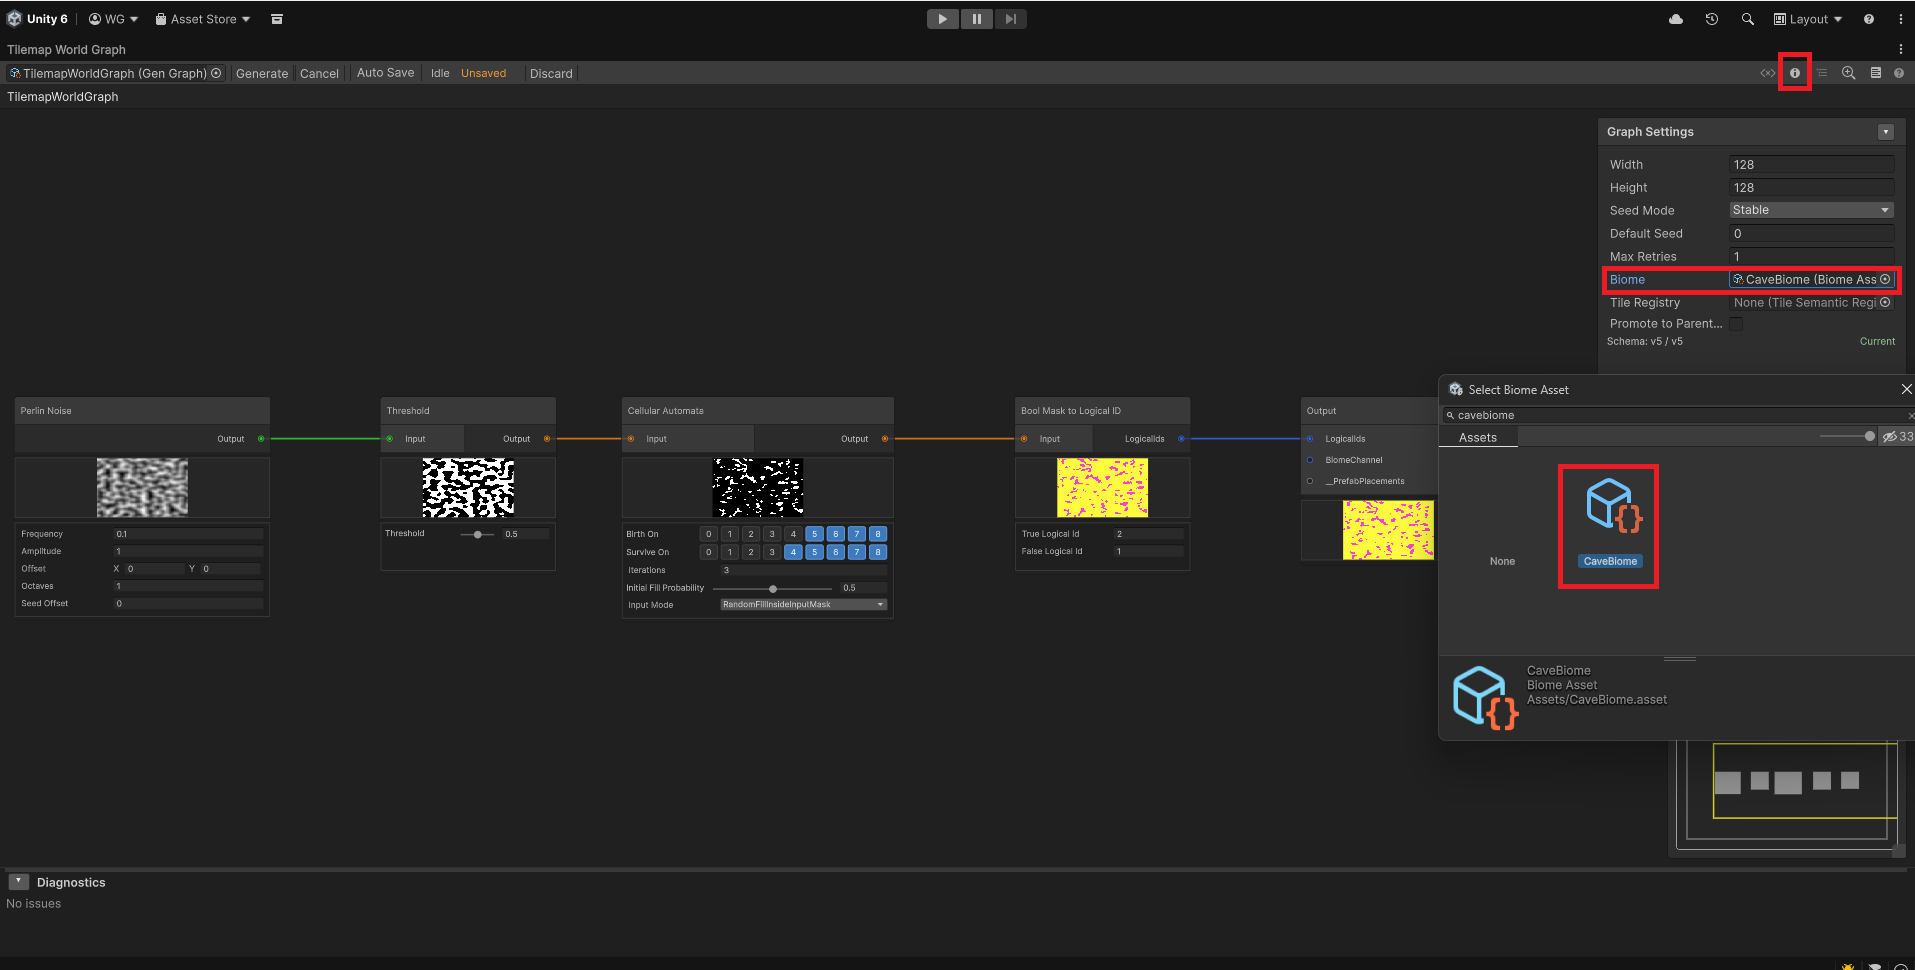
- Important: Open the graph editor's Graph Settings panel (infromation icon) if not already open and assign your
CaveBiometo the Default Biome slot.- This is crucial for visual feedback; it allows the editor to use your biome's tile mappings to render a live preview of the graph as you build it.
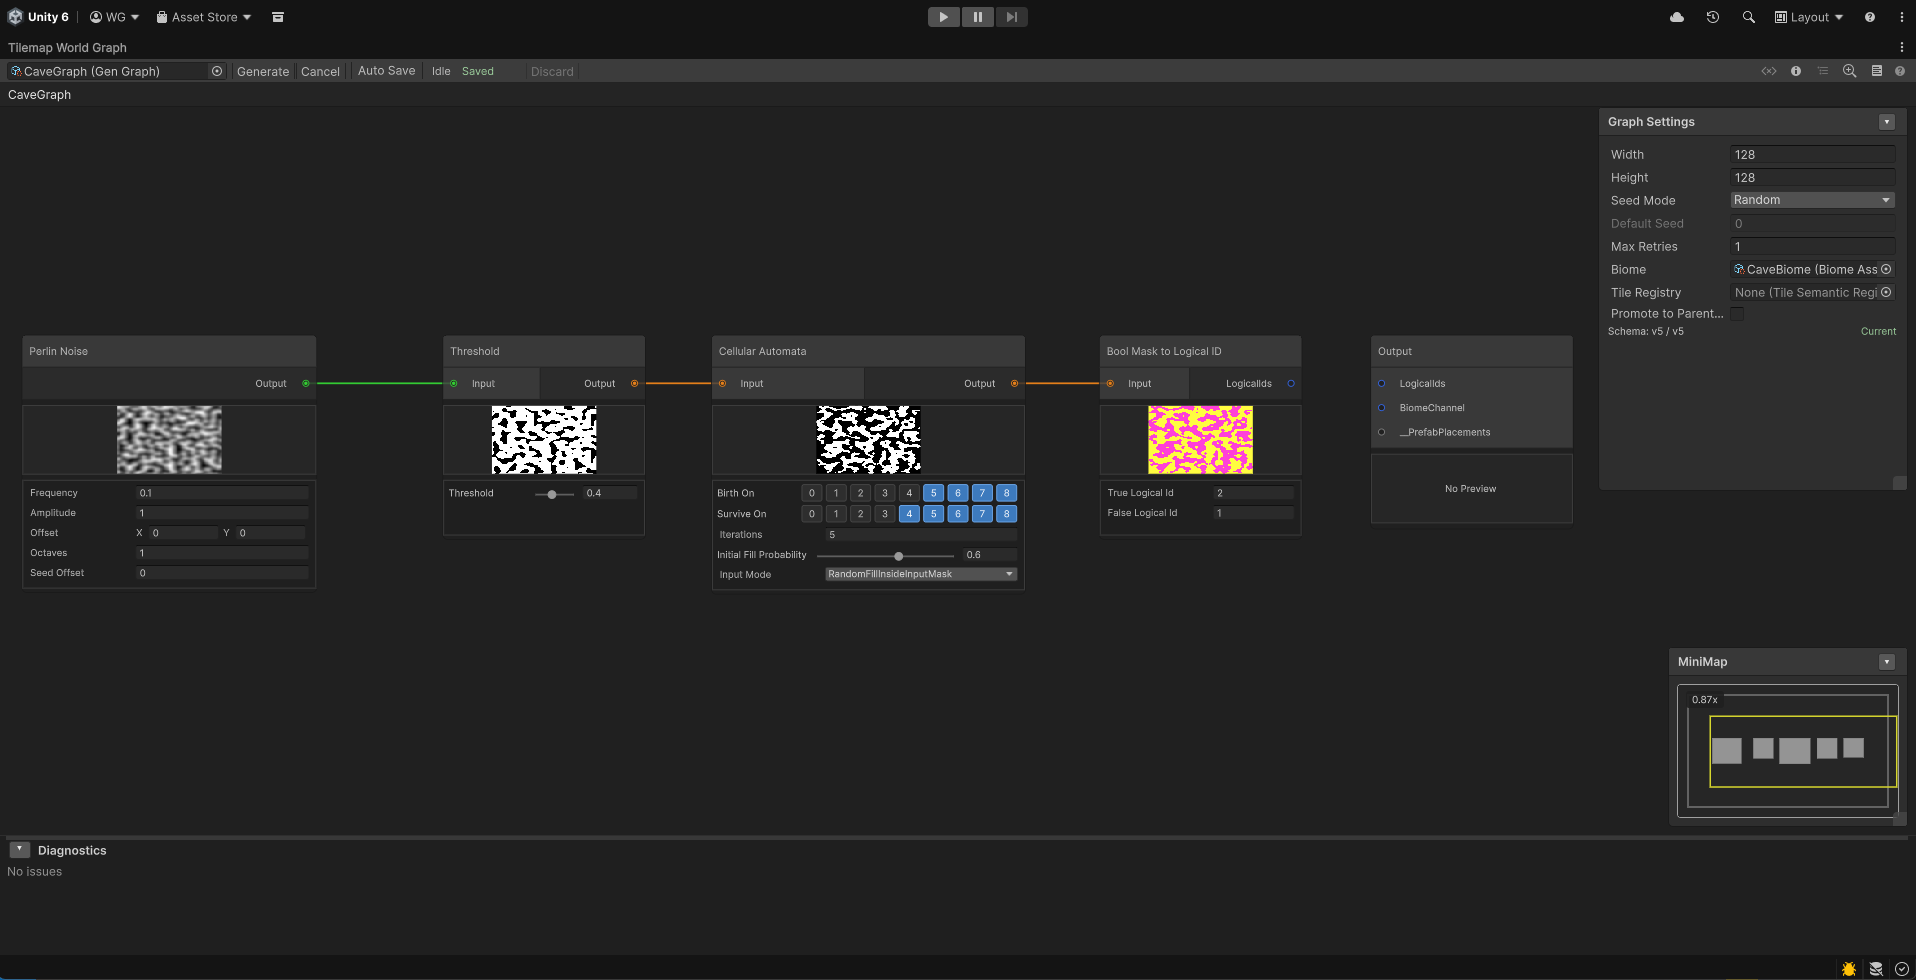
Step 3: Building the Cave Logic
Inside the Editor, we will chain nodes to create an organic shape.
3a. Generate Noise
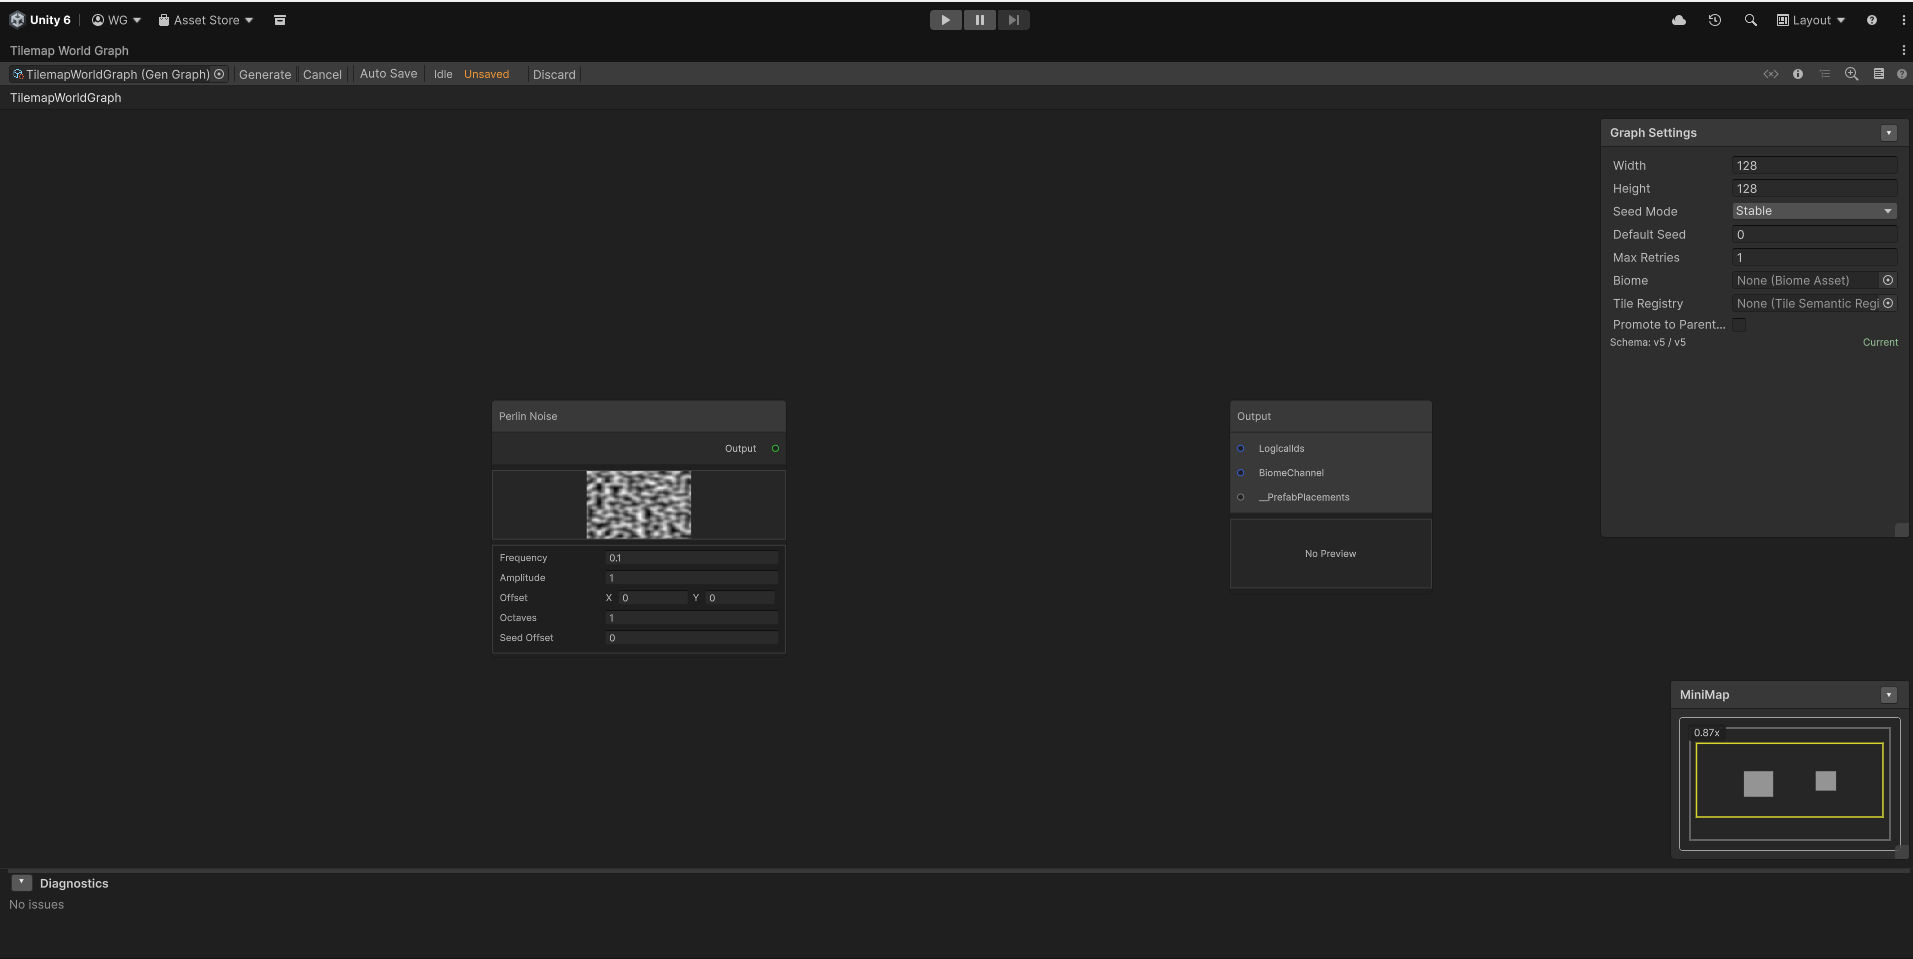
Add a Perlin Noise node by right clicking any empty space in the graph editor and select 'Add Node' then 'Noise' then 'Perlin Noise' or press spacebar, type 'Perlin Noise' and press enter. This creates the base "cloud" of values that will become our caves.
- Adjust the
Frequencyto around0.1.
3b. Threshold the Noise
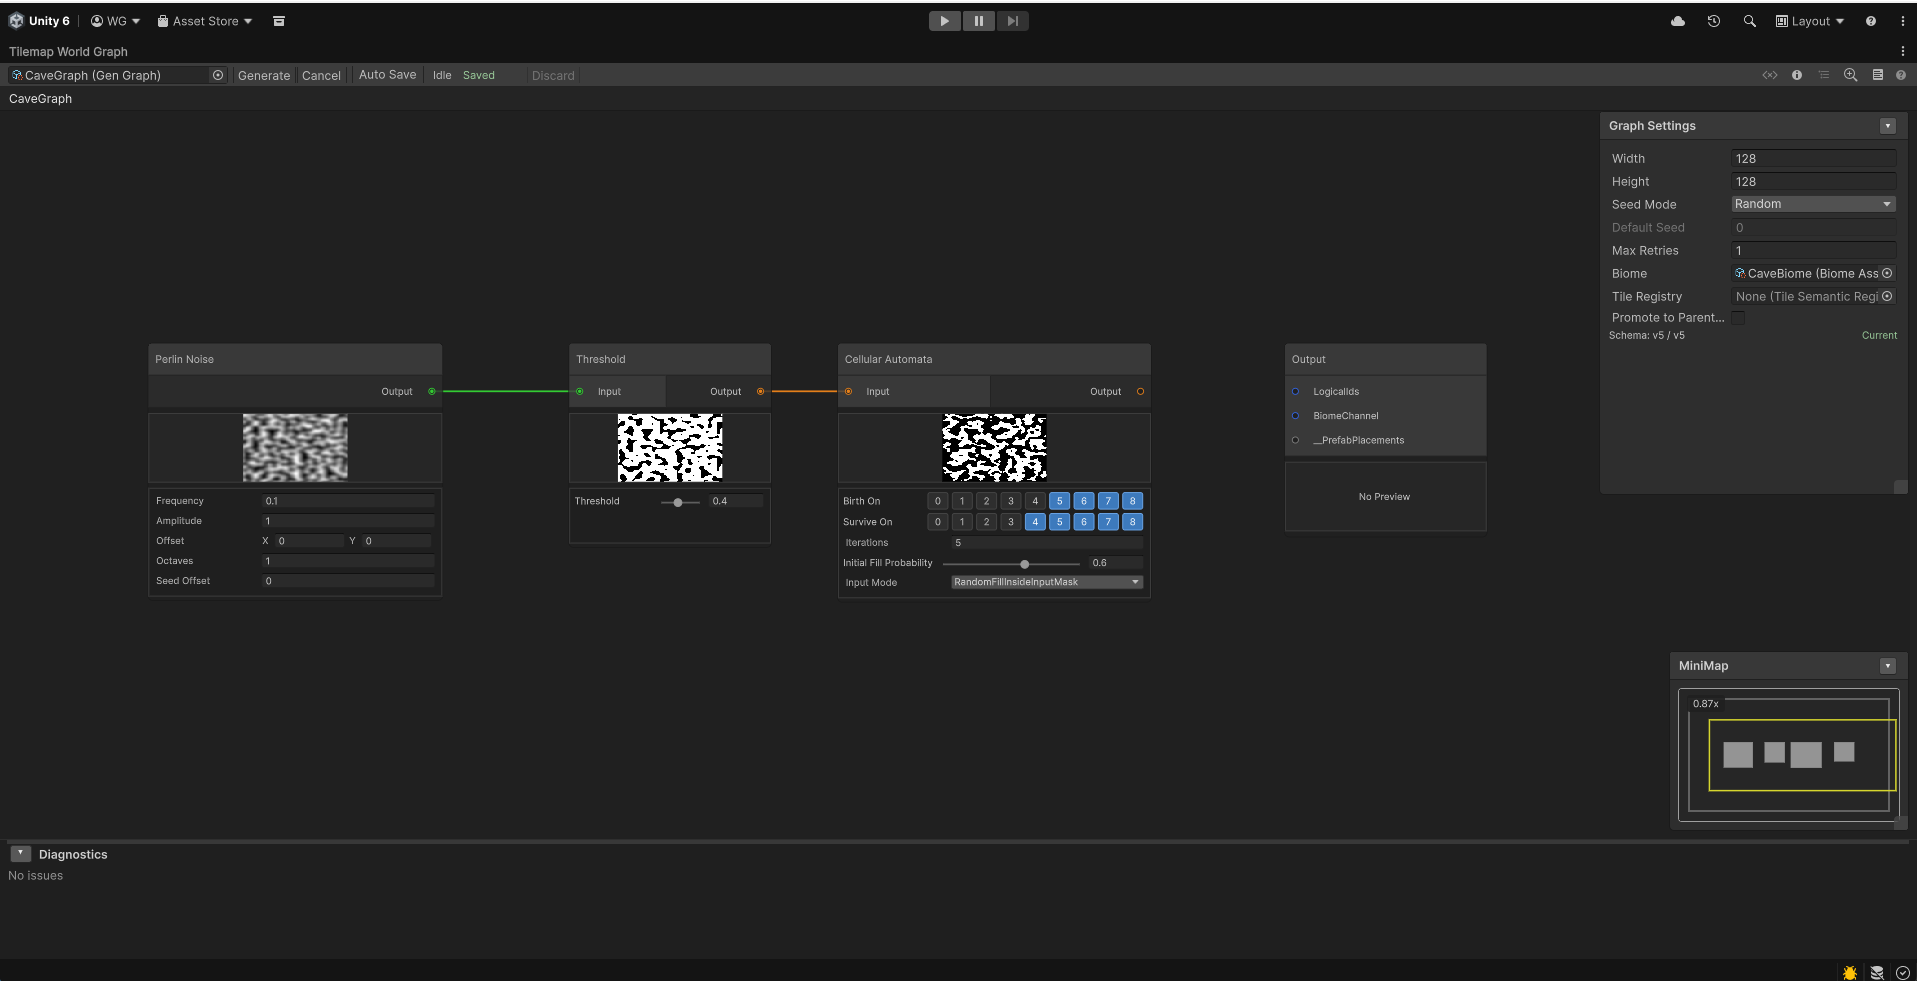
Add a Threshold node by right clicking any empty space in the graph editor and select 'Add Node' then 'Filter' then 'Threshold' or press spacebar, type 'Threshold' and press enter. Connect the  output of the Perlin Noise node to the input of the Threshold node.
- Set the
Thresholdvalue (e.g.,0.4). This converts the fuzzy noise into sharp black-and-white shapes.

3c. Smooth the Shapes
Add a Cellular Automata node by right clicking any empty space in the graph editor and select 'Add Node' then 'Filter' then 'Cellular Automata' or press spacebar, type 'Cellular Automata' and press enter. Connect the  output of the Threshold node to the input of the Cellular Automata node.
- Set
Iterationsto5andInitial Fill Probabilityto0.6. This will remove "speckles" and make the caves look more natural.
3d. Assign Logical IDs
Add a Bool Mask to Logical ID node by right clicking any empty space in the graph editor and select 'Add Node' then 'Output' then 'Bool Mask to Logical ID' or press spacebar, type 'Bool Mask to Logical ID' and press enter.
- Connect the Cellular Automata output to the input of the Bool Mask to Logical ID node.
- Set True ID to
1(Floor) and False ID to2(Wall).
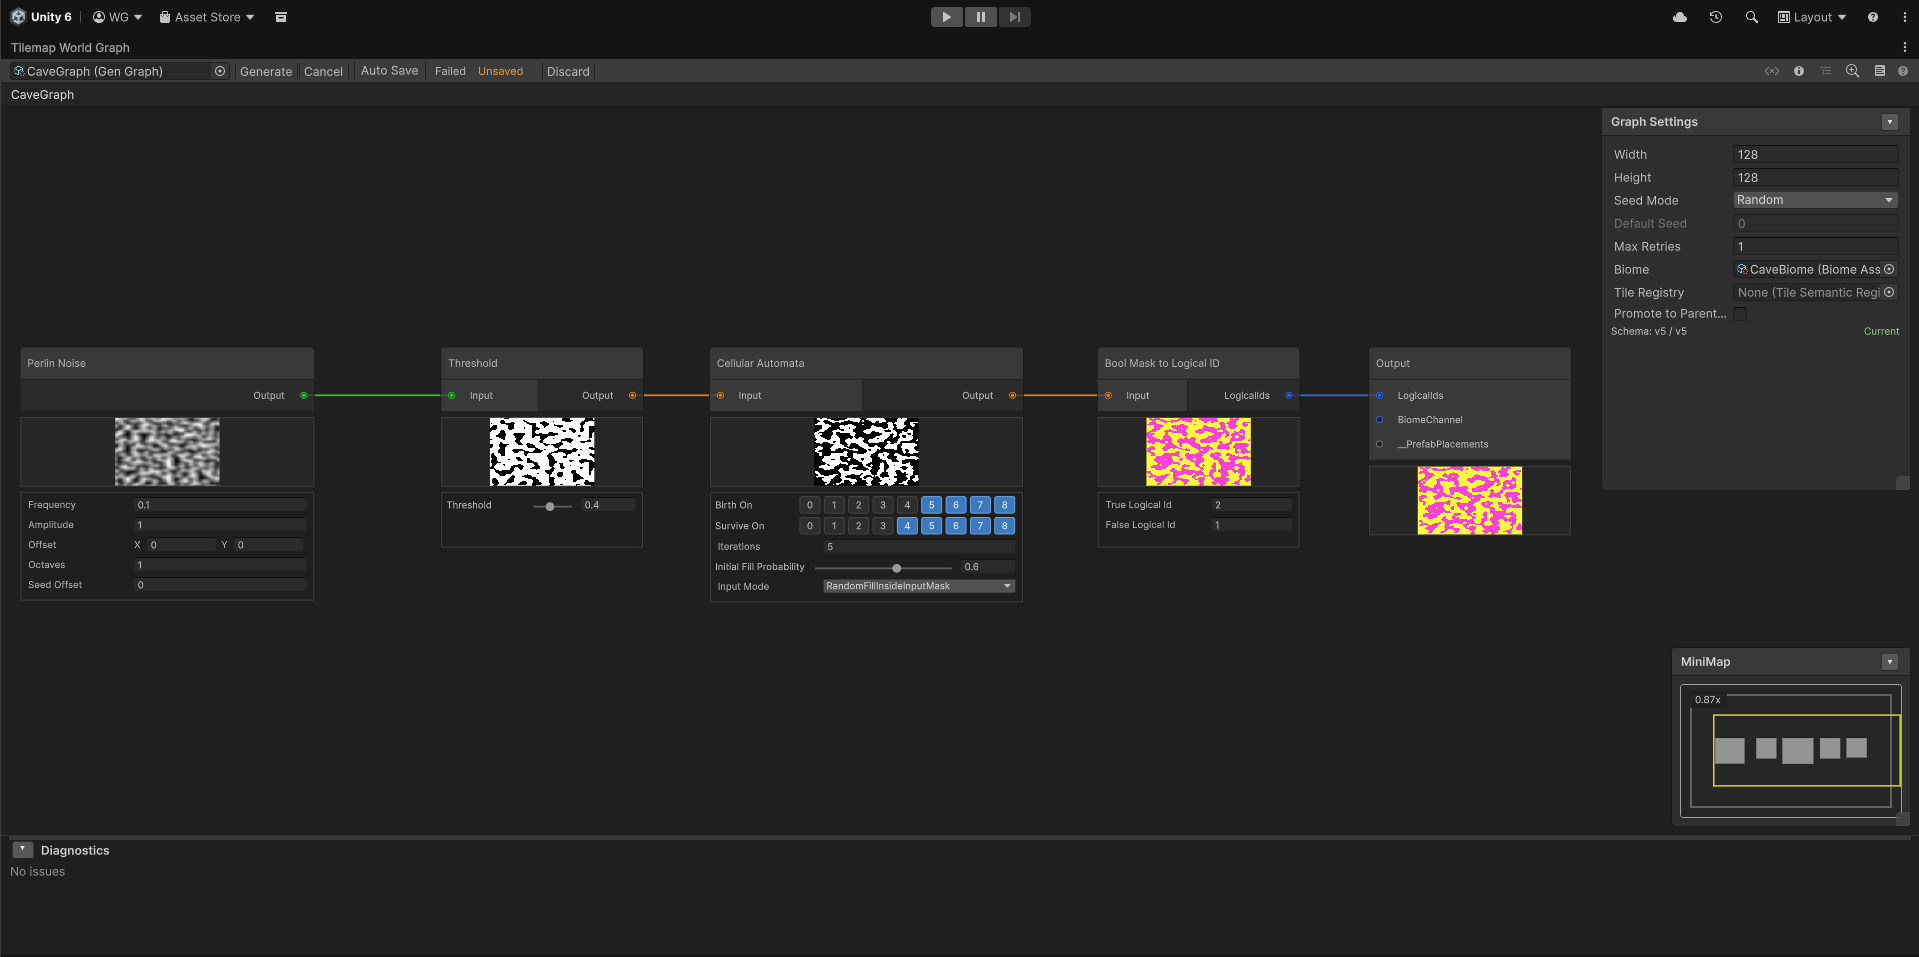
3e. Terminal Output
Connect your final  Logical ID result to the Output port on the Terminal Output node (this node is automatically included in every graph). Simply drag a connection to the corresponding port on the Output node to define what tiles will be generated.
Step 4: Set Up the Scene Generator
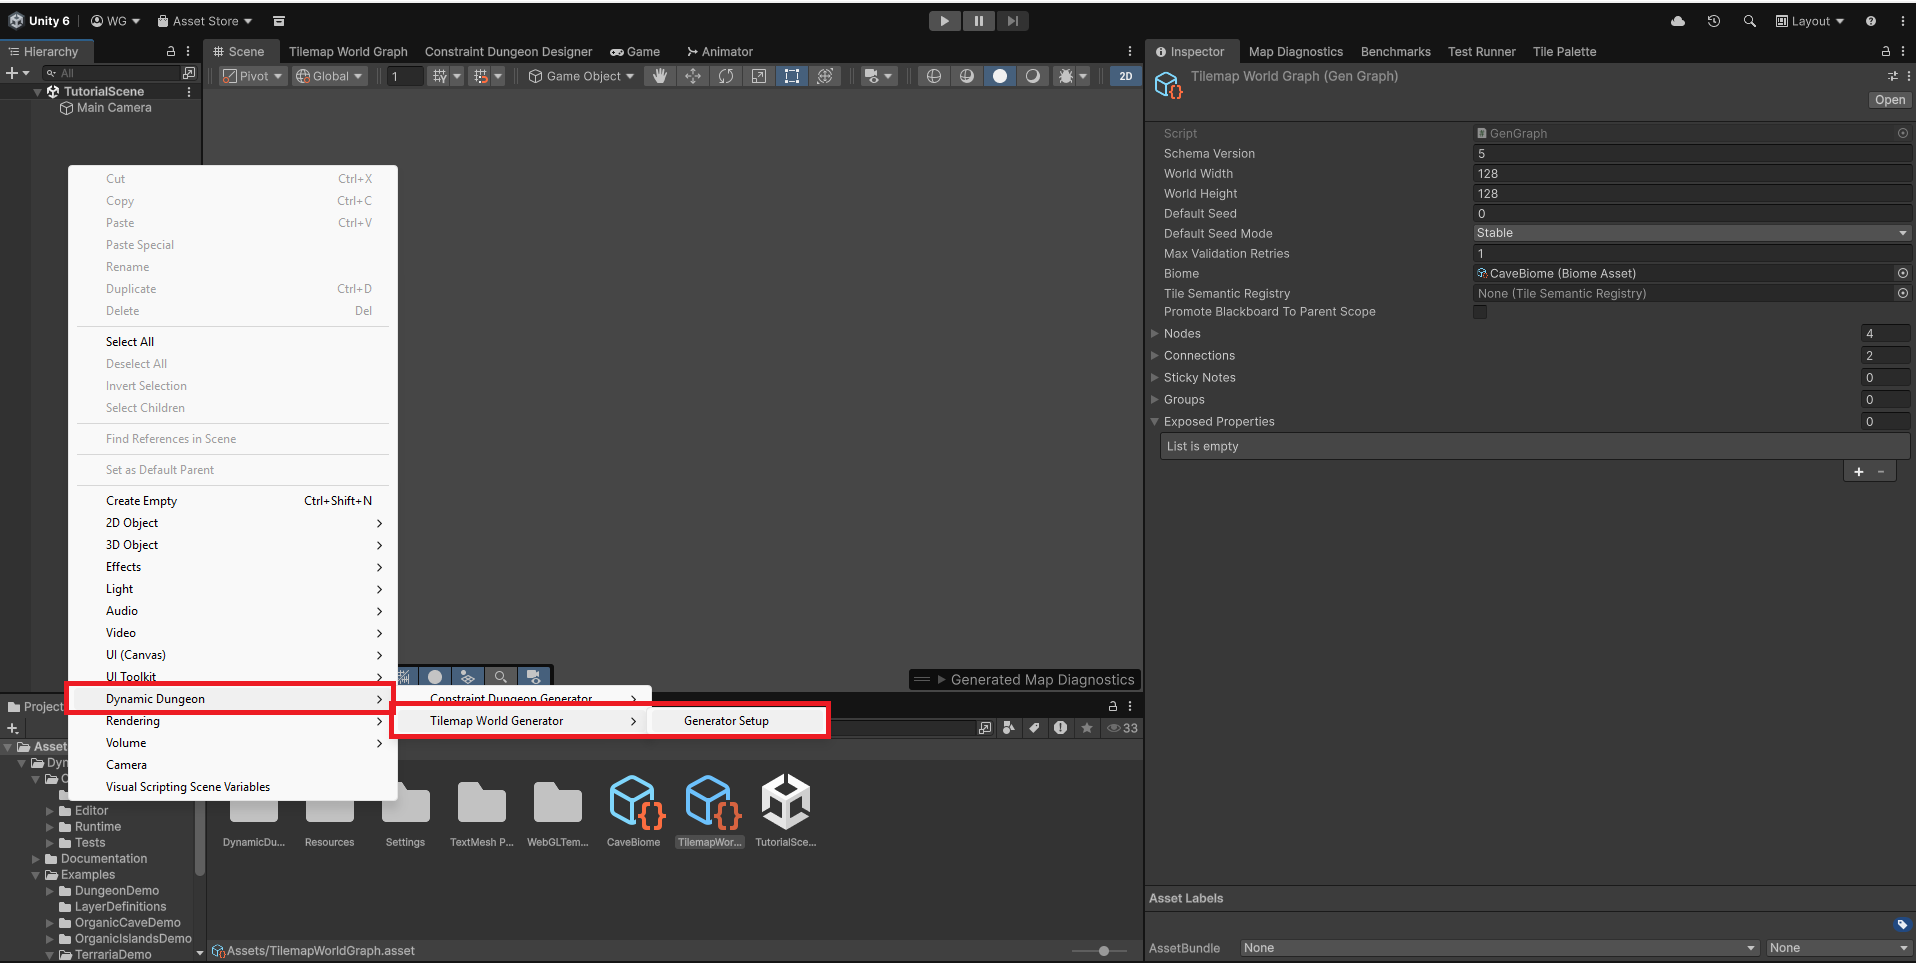
- In your Unity Scene Hierarchy, right-click and select: Dynamic Dungeon > Tilemap World Generator > Generator Setup.
- This automatically creates a Grid, Tilemap layers, and the Tilemap World Generator component.
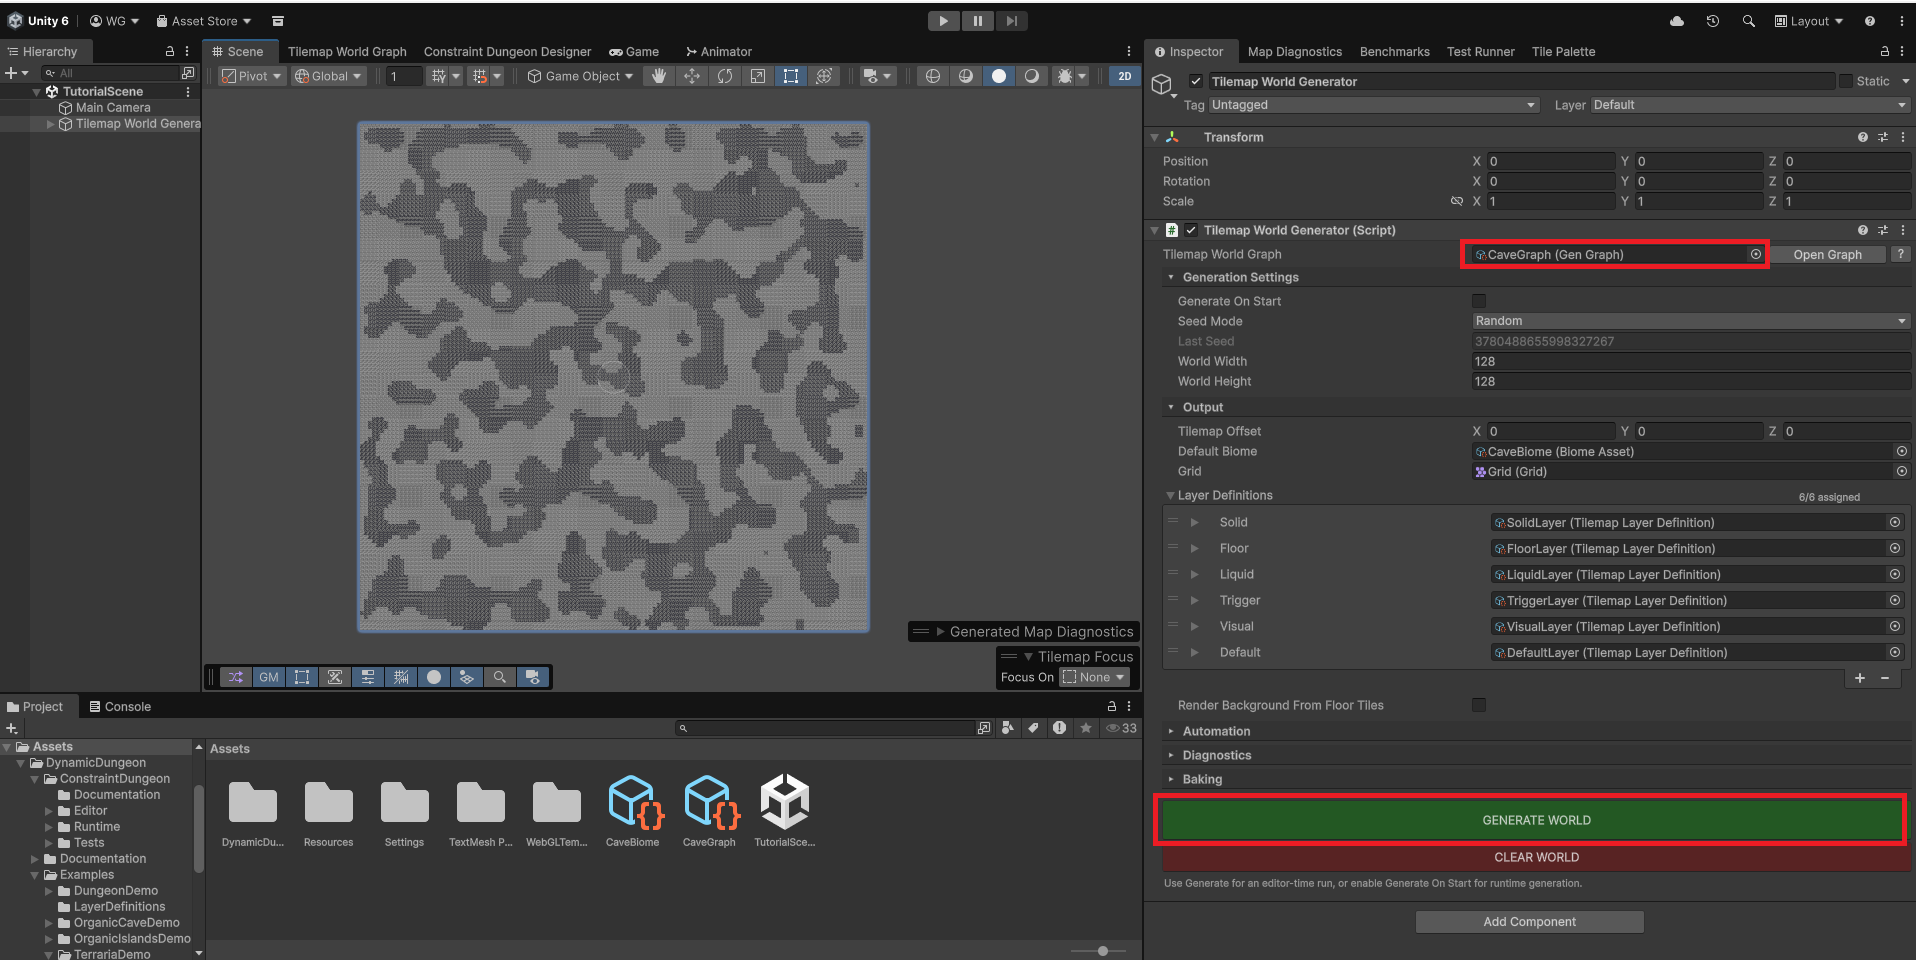
- Assign your
CaveGraphandCaveBiomein the inspector. - Observe that the Layer Definitions have been automatically populated. The tool links your graph outputs to the corresponding scene Tilemaps (e.g., the "Walls" layer).
- Set World Dimensions to
100 x 100. - Click Generate.