Tutorial 2: Creating Your First Dungeon
In this tutorial, we will use the Constraint Generator to build a structured dungeon made of hand-crafted room templates.
Prerequisites
- A few Room Prefabs (e.g., a 10x10 room, a 5x10 corridor).
- Tiles or sprites already placed in those prefabs.
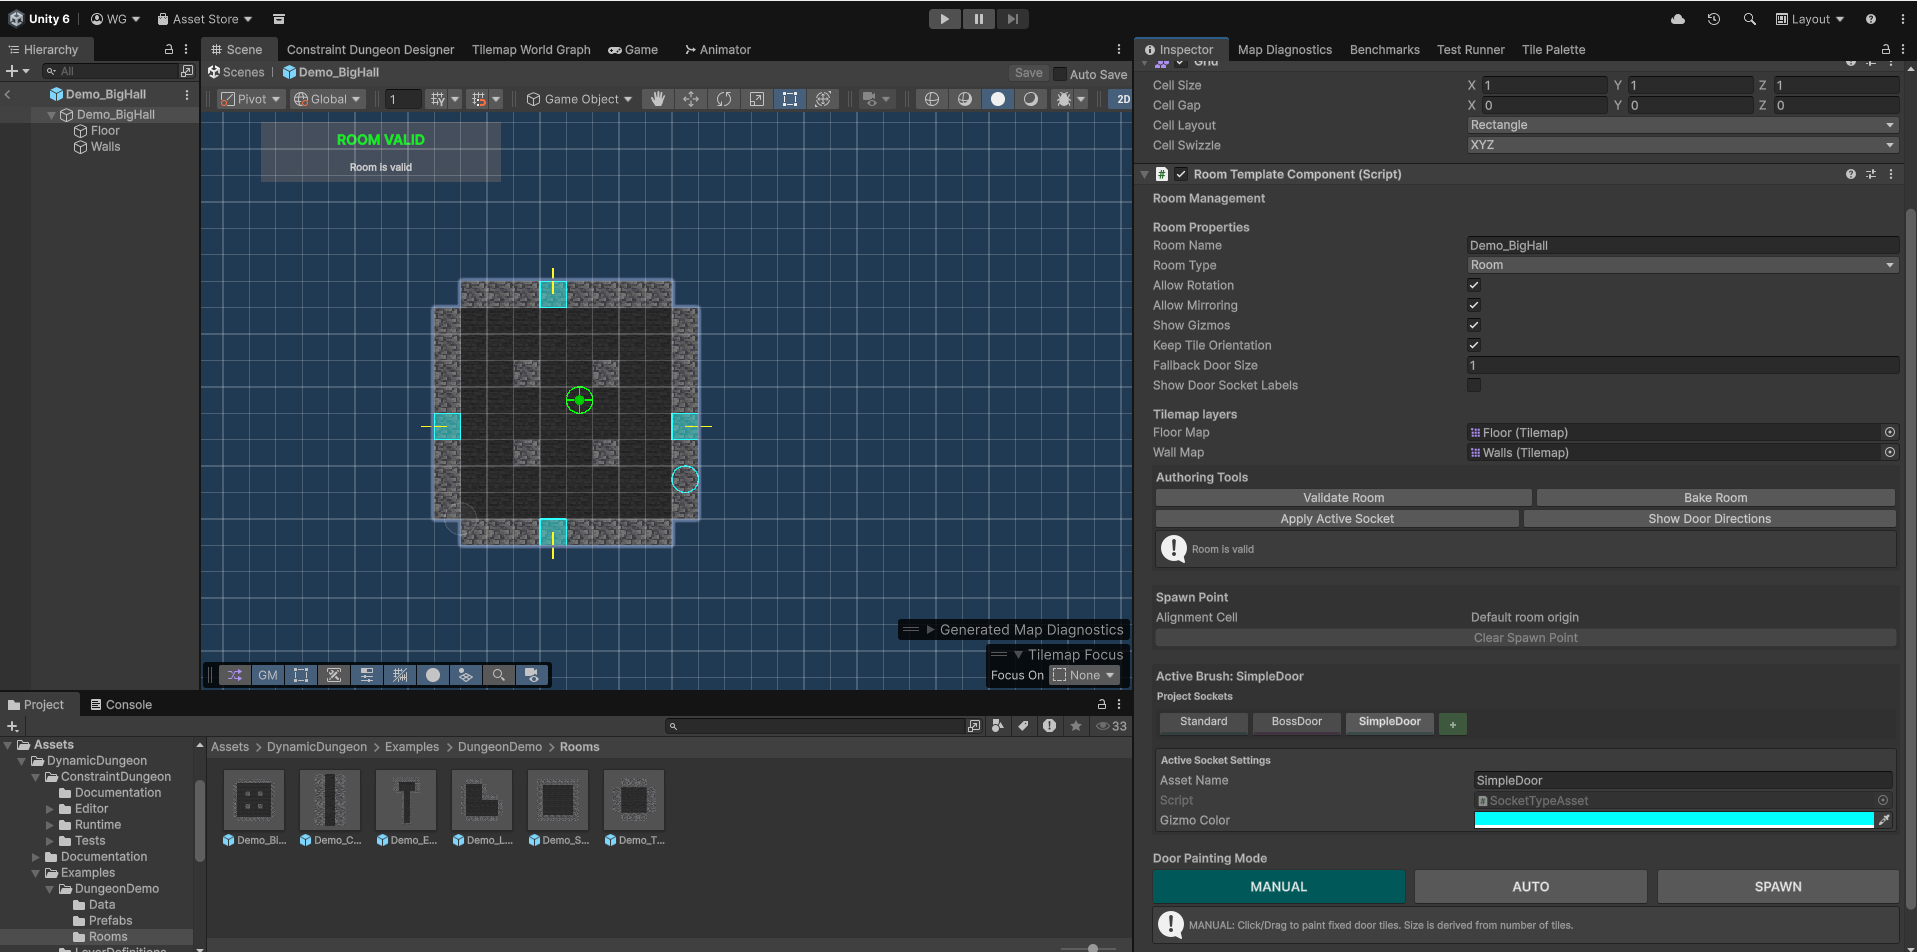
Step 1: Prepare Room Templates (Optional)
The generator needs to know where the doors are in your prefabs. If you want to dive straight in, you can skip this step and use the provided room templates in Assets/DynamicDungeon/Examples/DungeonDemo/Rooms.
To create your own:
- Create a New Room: Right-click in the Project window and select Create > Dynamic Dungeon > Constraint Dungeon Generator > New Room Prefab.
- This creates a pre-configured prefab with the Room Template Component and necessary Tilemap layers (Floor, Walls, etc.) already linked.
- Open the Prefab: Double-click your new prefab to enter Prefab Mode.
- Paint Your Room: Paint tiles onto the
FloorandWallstilemaps. - Define Doors: Use the Door Painting buttons in the
Room Template Componentinspector:- Click MANUAL to paint specific door tiles directly onto your tilemap.
- Click AUTO to paint an area where a door can dynamically spawn.
- Baking: You don't need to manually bake! The room data is automatically baked whenever you save the prefab or change its properties.
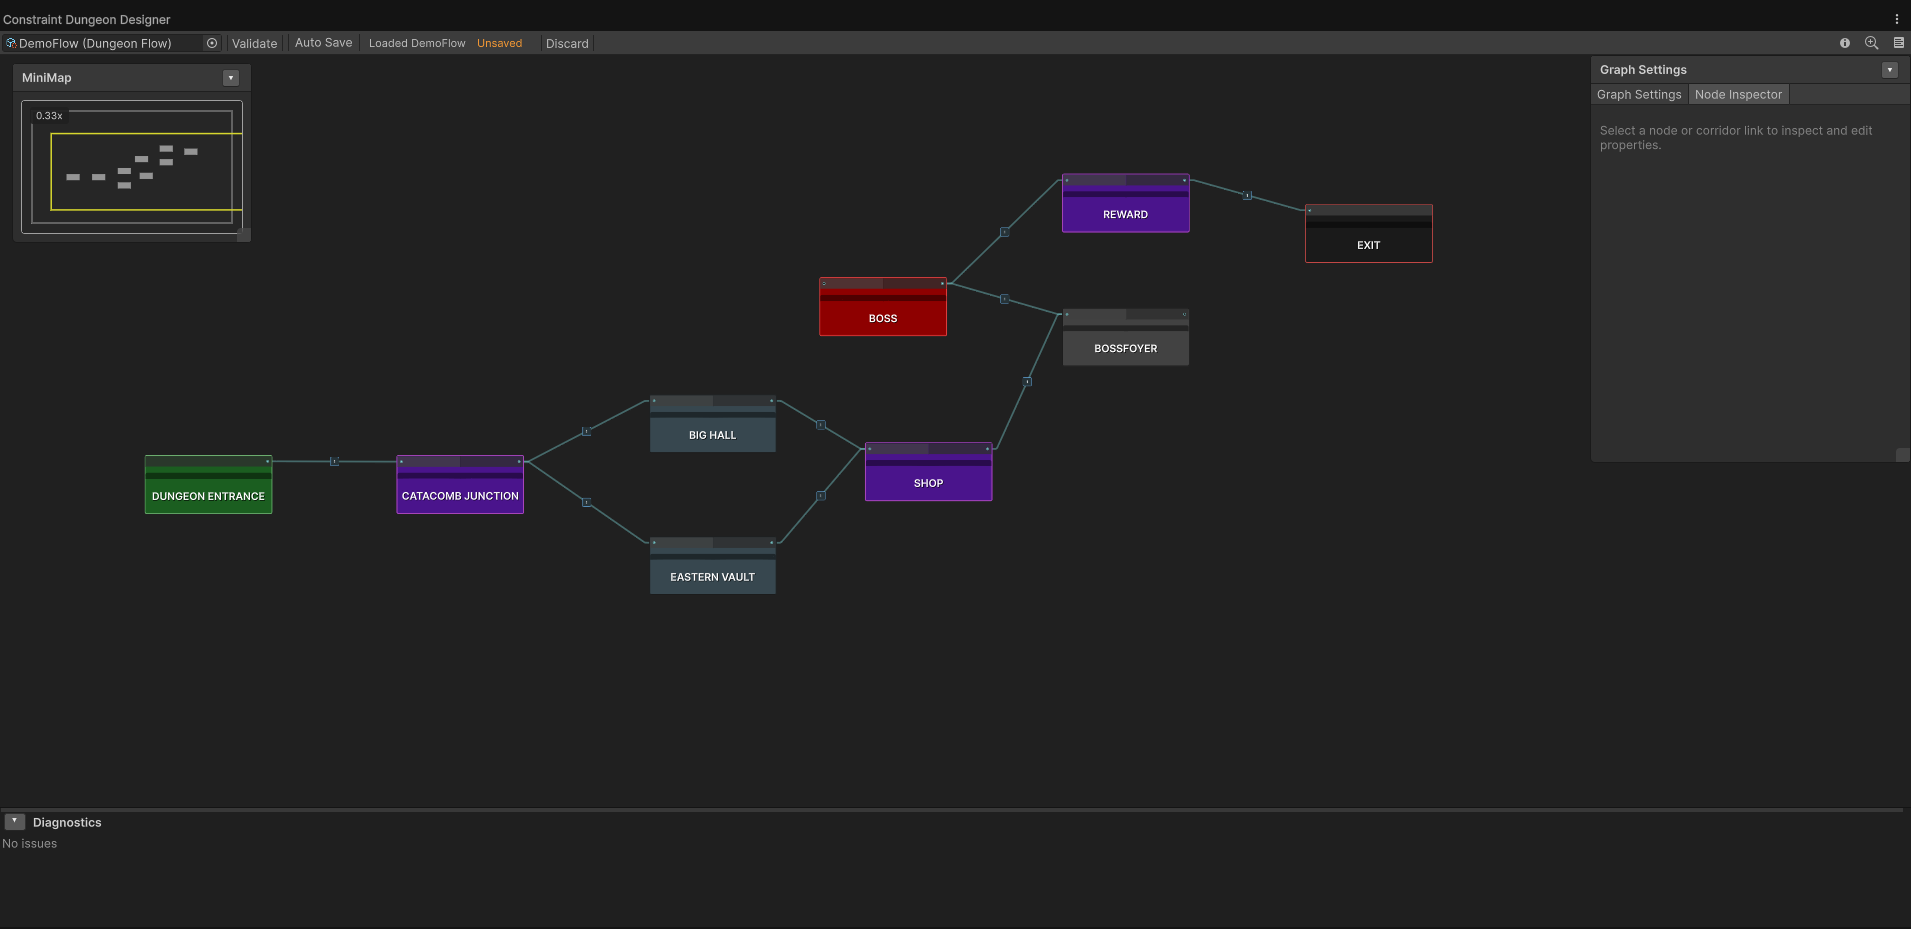
Step 2: Create a Dungeon Flow
A "Flow" defines the logical layout of your dungeon.
- Right-click in Project: Create > Dynamic Dungeon > Constraint Dungeon Generator > Dungeon Flow.
- Name it
SimpleDungeonFlow. - Open the Dungeon Designer window via Window > Dynamic Dungeon > Constraint Dungeon Designer.
- Right-click to add nodes:
- Entrance (Spawn): Where the player begins.
- Normal Room: A generic room.
- Exit: The end of the dungeon.
- Draw lines between them to define the path.
- Assign Templates to Nodes:
- Select a node in the graph.
- In the Node Inspector panel on the right, add your room prefabs to the Templates list. You can add multiple prefabs to a single node to allow the generator to pick one randomly.
- Configure Corridor Links:
- Select a line (edge) between two nodes.
- In the inspector, you can assign specific corridor templates.
- Tip: Set the Corridor Count to
0to force the rooms to be placed directly adjacent to each other (side-by-side).
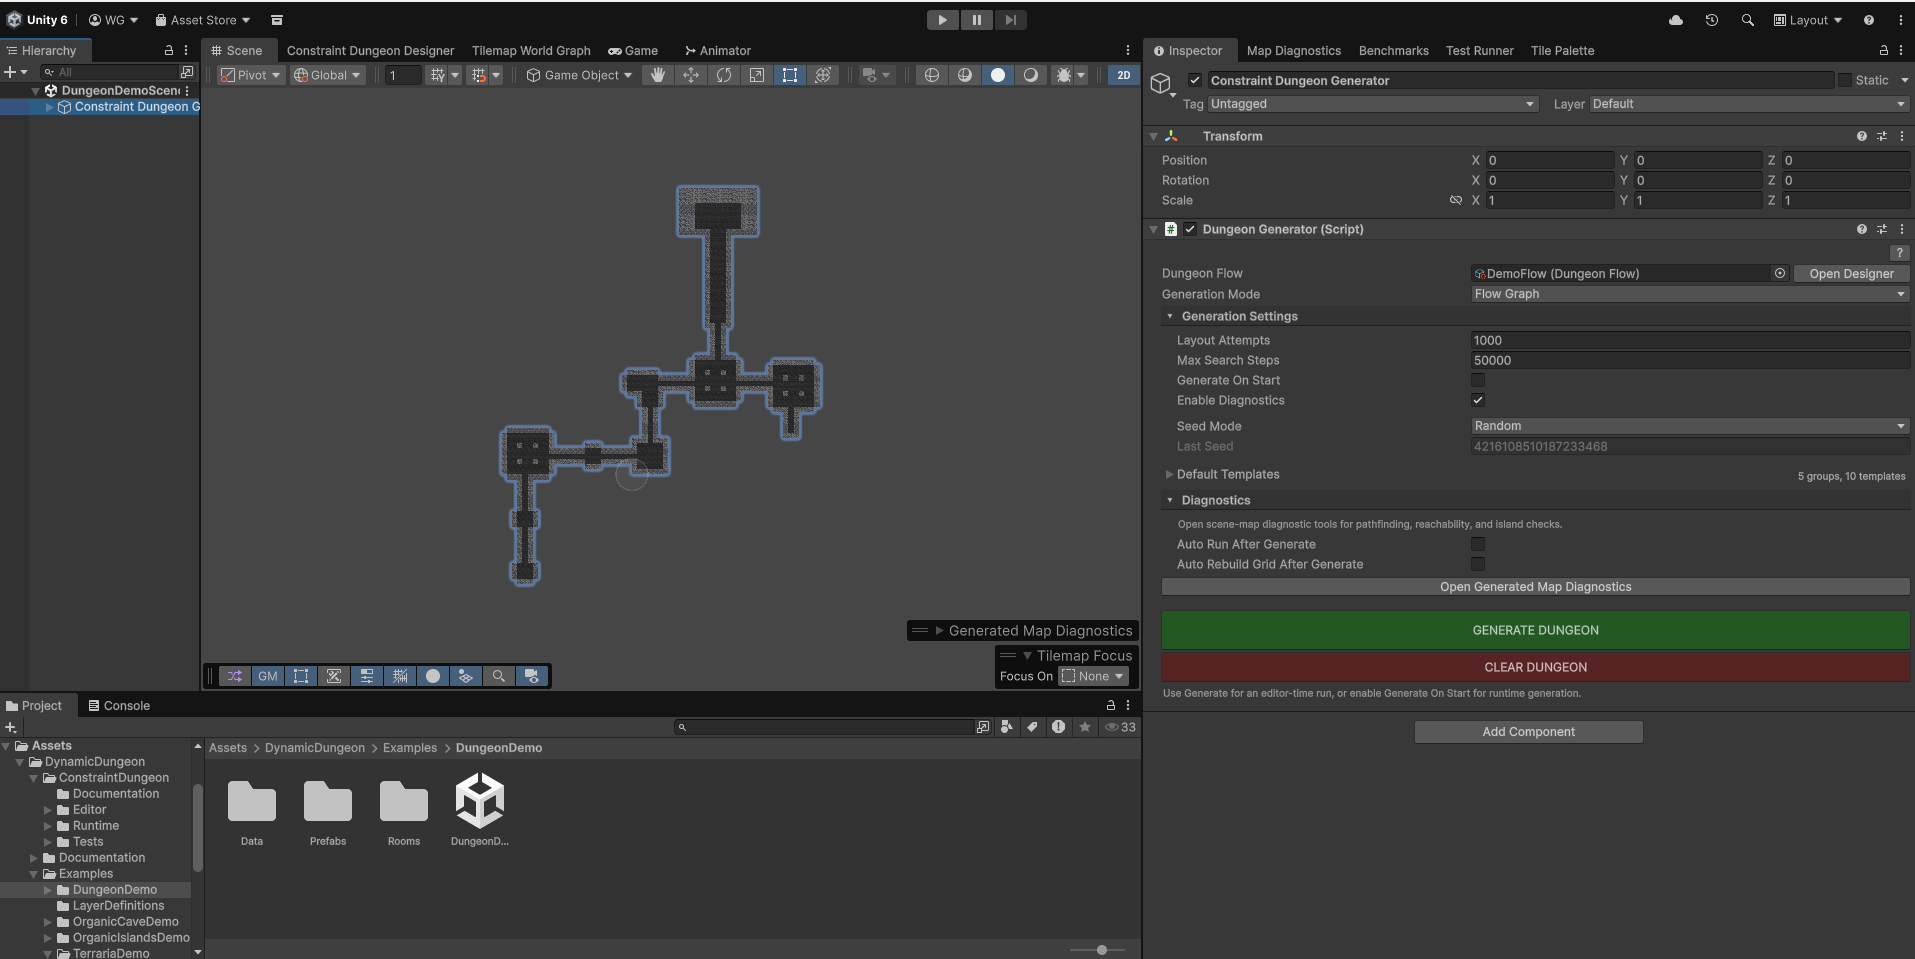
Step 3: Configure the Generator
- In your Unity Hierarchy, right-click and select: Dynamic Dungeon > Constraint Dungeon Generator > Generator Setup.
- This creates a pre-configured GameObject with the Dungeon Generator component attached.
- Set Generation Mode to
Flow Graph. - Assign your
SimpleDungeonFlowasset. - (Optional) In your SimpleDungeonFlow asset inspector, add room prefabs to the Default Templates list. These will be used for any nodes in your graph that don't have specific templates assigned.
Step 4: Generate
- Click Generate in the inspector.
- The solver will attempt to fit your templates together according to the flow graph.
- If successful, the dungeon will appear as instantiated prefabs in your scene.
Troubleshooting
If you see "Generation Failed":
- Check that your Sockets match (e.g., both doors have the
SmallDoorsocket type). - Ensure you have enough variety in your template library (if the flow requires a 3-way branch but you only have linear corridors, it will fail).
- Enable Enable Diagnostics in the Generator inspector to see a step-by-step log of the solver's attempts.